Sea gull lighting 78136-08 Installation Guide

Browse online or download Installation Guide for Unknown Sea gull lighting 78136-08. Sea Gull Lighting 78136-08 Installation Guide User Manual

  • Download
  • Add to my manuals
  • Print
  • Page
    / 2
  • Table of contents
  • BOOKMARKS
  • Rated. / 5. Based on customer reviews
Page view 0
Be sure the electricity to the system you are working on is turned
off; either the fuse removed or the circuit breaker set at off.
Use of other manufacturers components will void warranty, listing
a
nd create a potential safety hazard.
If you are unclear as to how to proceed, contact a qualified
electrician.
You don’t need special tools to install this fixture.
Be sure to follow the steps in the order given.
Read instructions carefully.
Save these instructions.
IMPORTANT SAFETY INSTRUCTIONS
FIGURE 1
*NO
T SUPPLIED
*OUTLET BOX
MOUNTING
BAR (A)
*OUTLET BOX
SCREWS
CANOPY (E)
KEYSLOTS (C)
GREEN
GROUNDING
SCREW (D)
NOTE: FOR FIXTURES PROVIDED WITH 75˚C OR 90˚C SUPPLY WIRE
(FOUND ON CARTON LABEL) WARNING ONLY: RISK OF FIRE. MOST
DWELLINGS BUILT BEFORE 1985 HAVE SUPPLY WIRE RATED 60˚C.
CONSULT A QUALIFIED ELECTRICIAN BEFORE INSTALLING.
CENTER
PIPE (G)
Installation And Safety Instructions
Line art shown may not exactly match the fixture enclosed. However, the installation instructions do apply to
this fixture. Fill in Item Number on Carton and File This Sheet For Future Reference. ITEM#_______________
HC-1568
0
71409
Carefully remove the fixture from the carton and check that all parts
are included, as shown in figure 1. Be careful not to misplace
any of the screws or parts which are needed to install this fixture.
BEFORE YOU BEGIN
To clean, wipe fixture with a soft cloth. Clean glass with a mild soap.
Do not use abrasive materials such as scouring pads or powders,
steel wool or abrasive paper.
Keep this sheet for future reference, and in case you need to order
replacement parts. Parts for this fixture can be ordered from place of
purchase. Be sure to use exact wording from illustration when
ordering parts.
CLEANING
ORDERING PARTS
Thread fixtur
e mounting screws BI) into thr
eaded holes of mounting
bar (A) 3 tur
ns each.
Secur
e mounting bar (A) to outlet box with outlet box scr
ews (not
supplied). Raised side is top as illustrated.
STEP 1:
STEP 2:
INSTALLATION
A. Use a listed wire connector to connect the fixtur
e hot wir
e (black
wire, or round and smooth tracer) to the supply hot wire.
B. Use a listed wire connector to connect the fixture common wire
(white wire, or square and rigid) to the supply common wire.
C. Gently try to remove the wir
es fr
om the connector. If you can
remove the wires, carefully re-do the wiring connection.
STEP 3:
DIFFUSER
(H)
FINIAL (D)
IMPOR
T
ANT
:
DO NOT ATTACH FIXTURE DIRECTLY TO OUTLET BOX
WITHOUT THE USE OF A MOUNTING BAR.
FIXTURE
MOUNTING
SCREWS (B)
Page view 0
1 2

Summary of Contents

Page 1

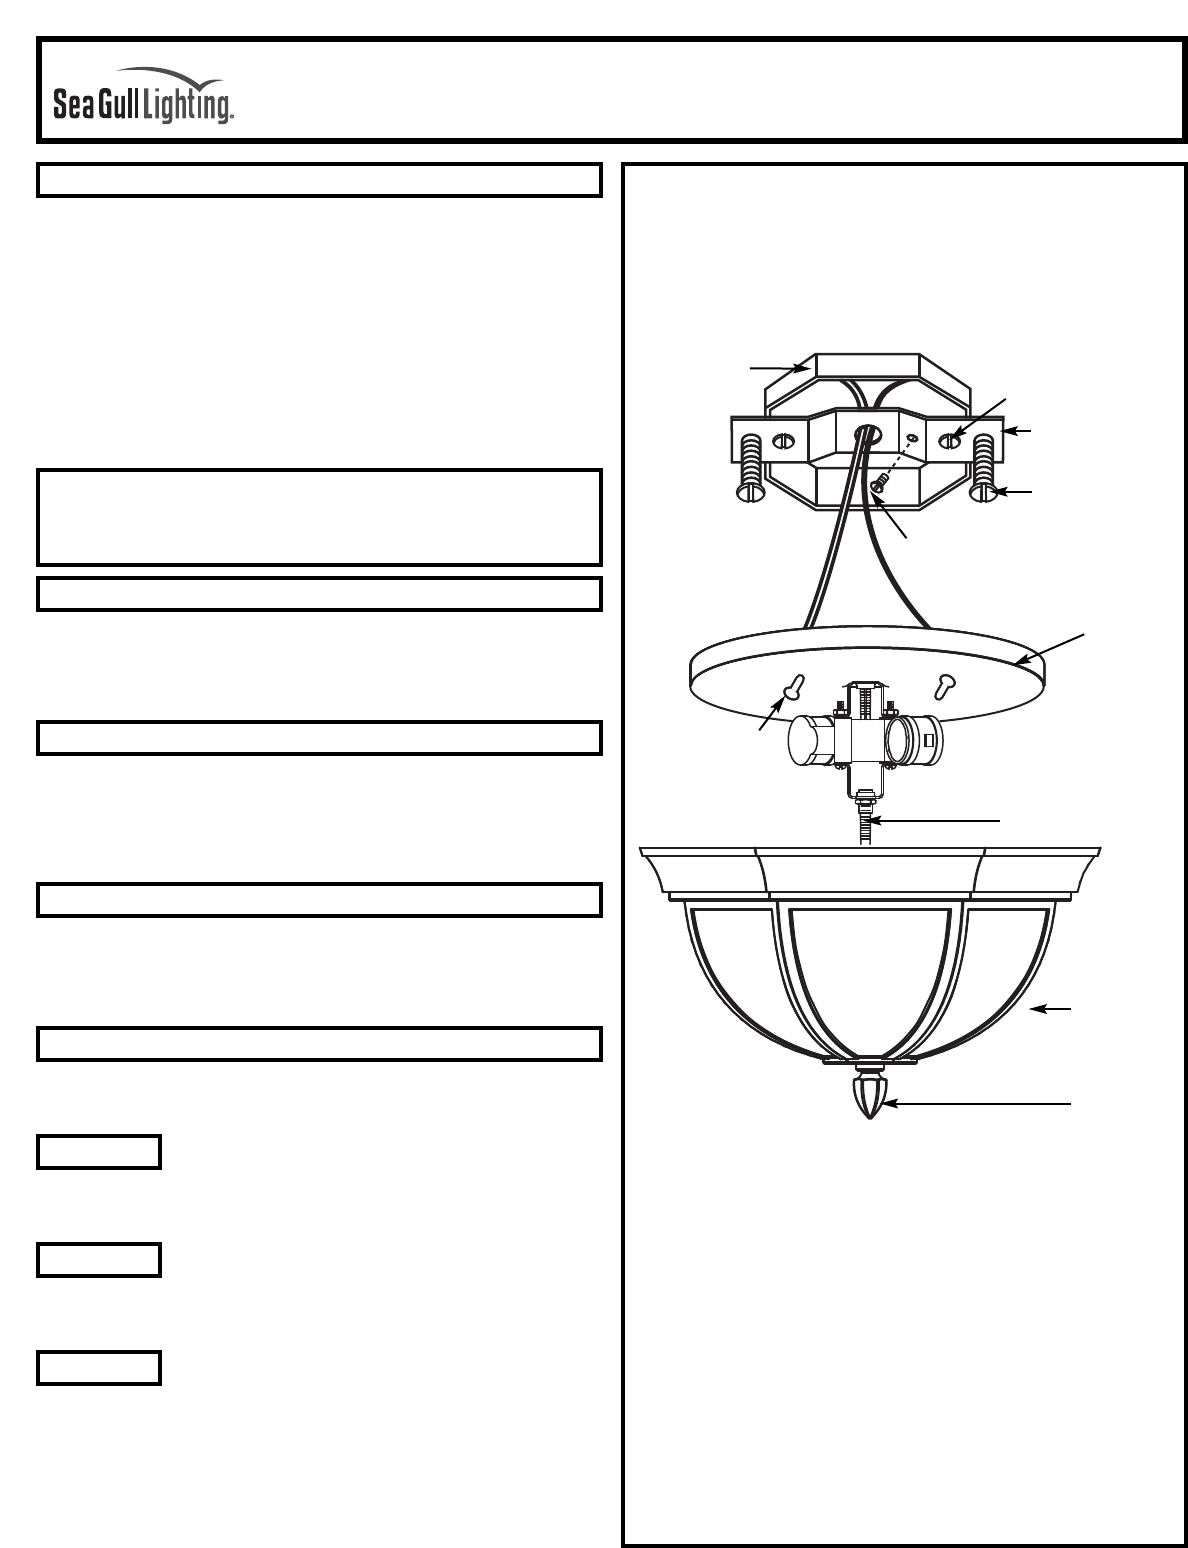
• Be sure the electricity to the system you are working on is turnedoff; either the fuse removed or the circuit breaker set at off.• Use of other manu

Page 2

GROUNDING INSTRUCTIONS:Connect the supply ground wire, fixture ground wire, and mountingbar ground wire (pre attached) using the supplied wiring conne

Comments to this Manuals

No comments